About the Recipe
Use these basic steps for making my bread recipes or let your imagination go and make your own variations.
Ingredients
Ingredients vary with recipes.
Preparation
There are 2 common types of yeast you can use to make bread:
Active Dry Yeast
Instant Yeast
Instant yeast is more convenient. It does not have to be proofed like active dry yeast and can be added directly to the flour mixture, saving a step. Regardless of the type of yeast you use, the end result will be the same. If you are using active dry yeast, follow the directions below for proofing. For instant yeast, skip the proofing instructions.
It should be noted that proofing the yeast does have the benefit of determining if the yeast is still alive or not. If your instant yeast is old, you should proof even if it doesn't have to be. That way, you will be sure it is still alive before ruining a batch of dough with dead yeast.
The instructions below are generic. The process described applies to most bread recipes in this blog. The photos are for reference and not necessarily taken for a specific recipe.
Proofing Active Dry Yeast
In a saucepot, combine the indicated amount of water and sugar.
Mix until the sugar is partially dissolved.
Heat the water to 100-110˚ F – 38-43˚ C (or according to yeast package directions).
Add the yeast and mix until the yeast is blended.
Cover the pot and place it in a warn area to let it proof. (10 to 15 minutes...could take longer depending on the temperature of the environment). It should be very foamy when proofed to the proper extent.


Making the Dough
In a large mixing bowl, combine the flour and salt along with any other dry ingredients called for in the recipe. If you are using active dry yeast, this will not include the yeast and the sugar as they will have been used in the previous step.

If you are using instant yeast, add the yeast and sugar directly to the flour mixture. You will have omitted the proofing step but the water must still be heated. Heat the required amount of water indicated in the recipe to 100-110˚F – 38-43˚C.
Flour can have little clumps that sometimes affect the consistency of the dough. It is a good practice to either sift the flour or work it through your fingers to loosen-up any clumps there might be.


Form a basin in the center of the flour mixture and gently pour in the water.


Begin by gradually incorporating the flour with the water using your fingers. Do not try to incorporate too much flour at once.
It will be messy at first but will become more like a bread dough as you work it. Knead until most of the flour mixture is incorporated and the dough is no longer excessively sticky.
It is important to try to complete this step in a timely manner and equally important that you do not over-knead the dough.
Flour varies with the way it absorbs water, making it very difficult to precisely determine exact ratios of water to flour. I have given the qualities that worked for me with the flour I used.
Bread flour will absorb more water than all-purpose flour. So, if the dough is too sticky, it's OK to add more flour to the mix so you can achieve the desired consistency.
If the flour absorbs less water, you will be left with a bit of extra flour after your dough reaches the desired consistency. If that is the case, discard the remaining flour as it will be too lumpy to re-use. You can sift any remaining flour and re-use it if you like, but there is usually not enough left over to bother.


Lay the dough in a large, greased (or buttered) mixing bowl and cover it with a tea towel.
Set the bowl in a warm place and let the dough rise until it has at least doubled in size.
Rising time will vary with the temperature of the environment but should take approximately 30-40 minutes.


Second Knead
Flour the surface of a clean countertop.
Turn the risen dough onto the floured surface.
Knead the dough until you have removed all the air bubbles. This should be a quick process, there is no need to over-knead.
Re-grease, or butter, the bowl you used to let the dough rise and set the dough back into it and, once again, cover the bowl with cling wrap or a tea towel.


Once again, set the bowl in a warm place and let the dough rise until it has at least doubled in size.
Rising time will vary with the temperature of the environment but should take approximately 30-40 minutes.
Making the Loaves
Flour the surface of a clean countertop.

Turn the risen dough onto the floured surface.
Knead the dough until you have removed all the air bubbles.
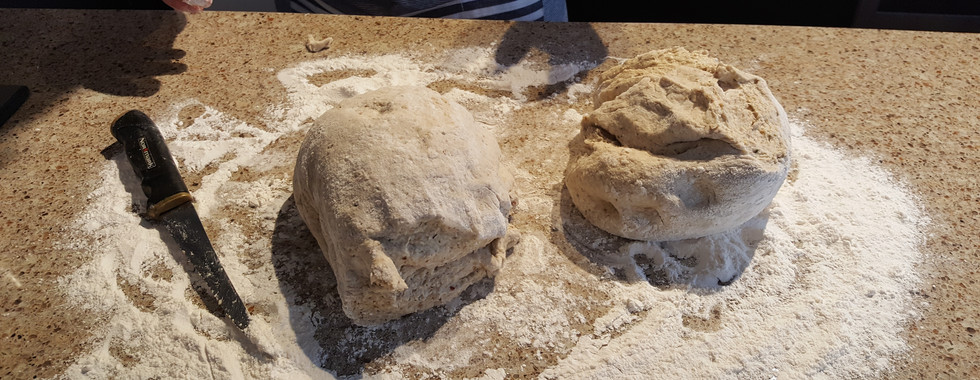
Use a sharp, greased knife to cut the dough into two even sized pieces.
You can do this by eye or, for greater accuracy, use a food scale.

Grease (or butter) a section of the countertop (about 18”x18”).
Take a dough-ball and knead it on the greased surface just enough to burst any remaining air bubbles and to form a nice loaf.
This may take a bit of getting used to but you should be making perfect loaves after a couple of tries.
Place the loaves in greased (or buttered) bread pans.
Cover the loaves with a tea towel and let them rise until they have doubled in size.


Once your loaves are close to have sufficiently risen, preheat the oven to the temperature indicated in the recipe. If your oven has the feature, use convection bake.
Unless otherwise indicated in a recipe: Use a sharp, greased or buttered knife to score the top of the loaves either diagonally or along the length of the loaves. This will allow steam to escape and prevent the bread from bursting along the tops during the baking process.
Bake the loaves for the number of minutes and at the temperature indicated in the recipe.
Set the loaves on a cooling rack or tea towel to cool off.
